Valve Cover Replacement & Modification
2002 Toyota Tacoma
The original owners of this vehicle had modified one of the ends of the valve cover, trimming it down slightly so it would fit properly. Because of this, when I went to replace the valve cover gasket, I inevitably cracked the end of the valve cover itself leading to a persistent oil leak. This project started as a simple replacement but turned into a custom modification involving a dremel, steel chunks, and JB Weld.
The Problem
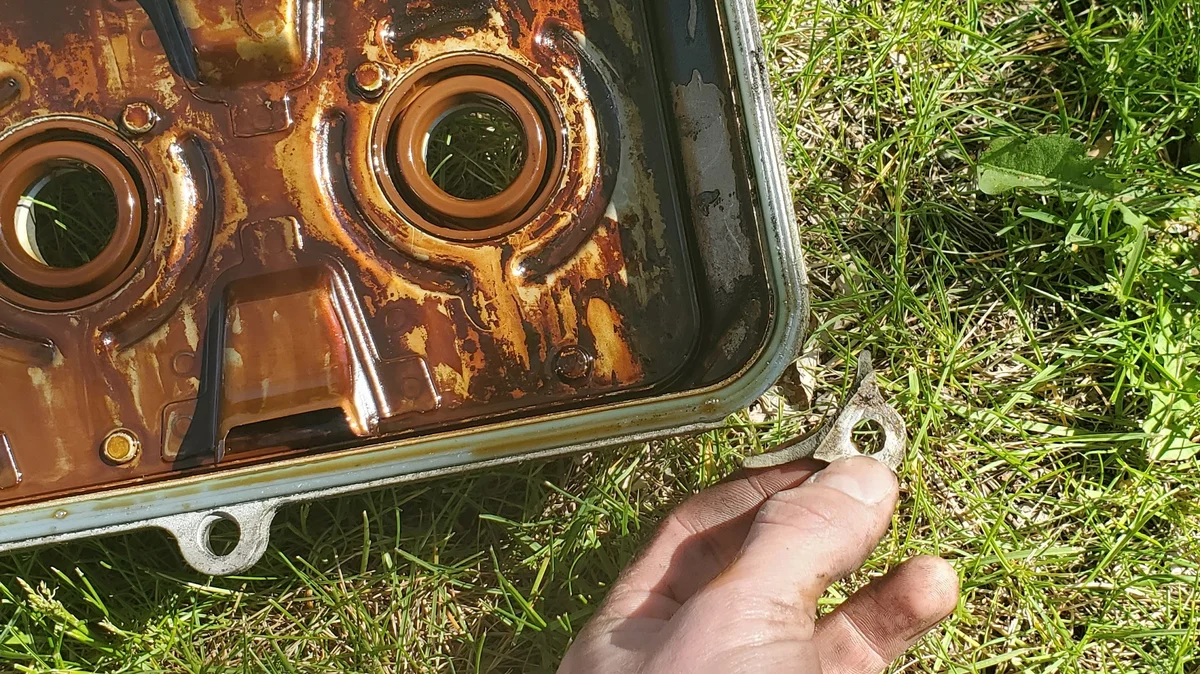
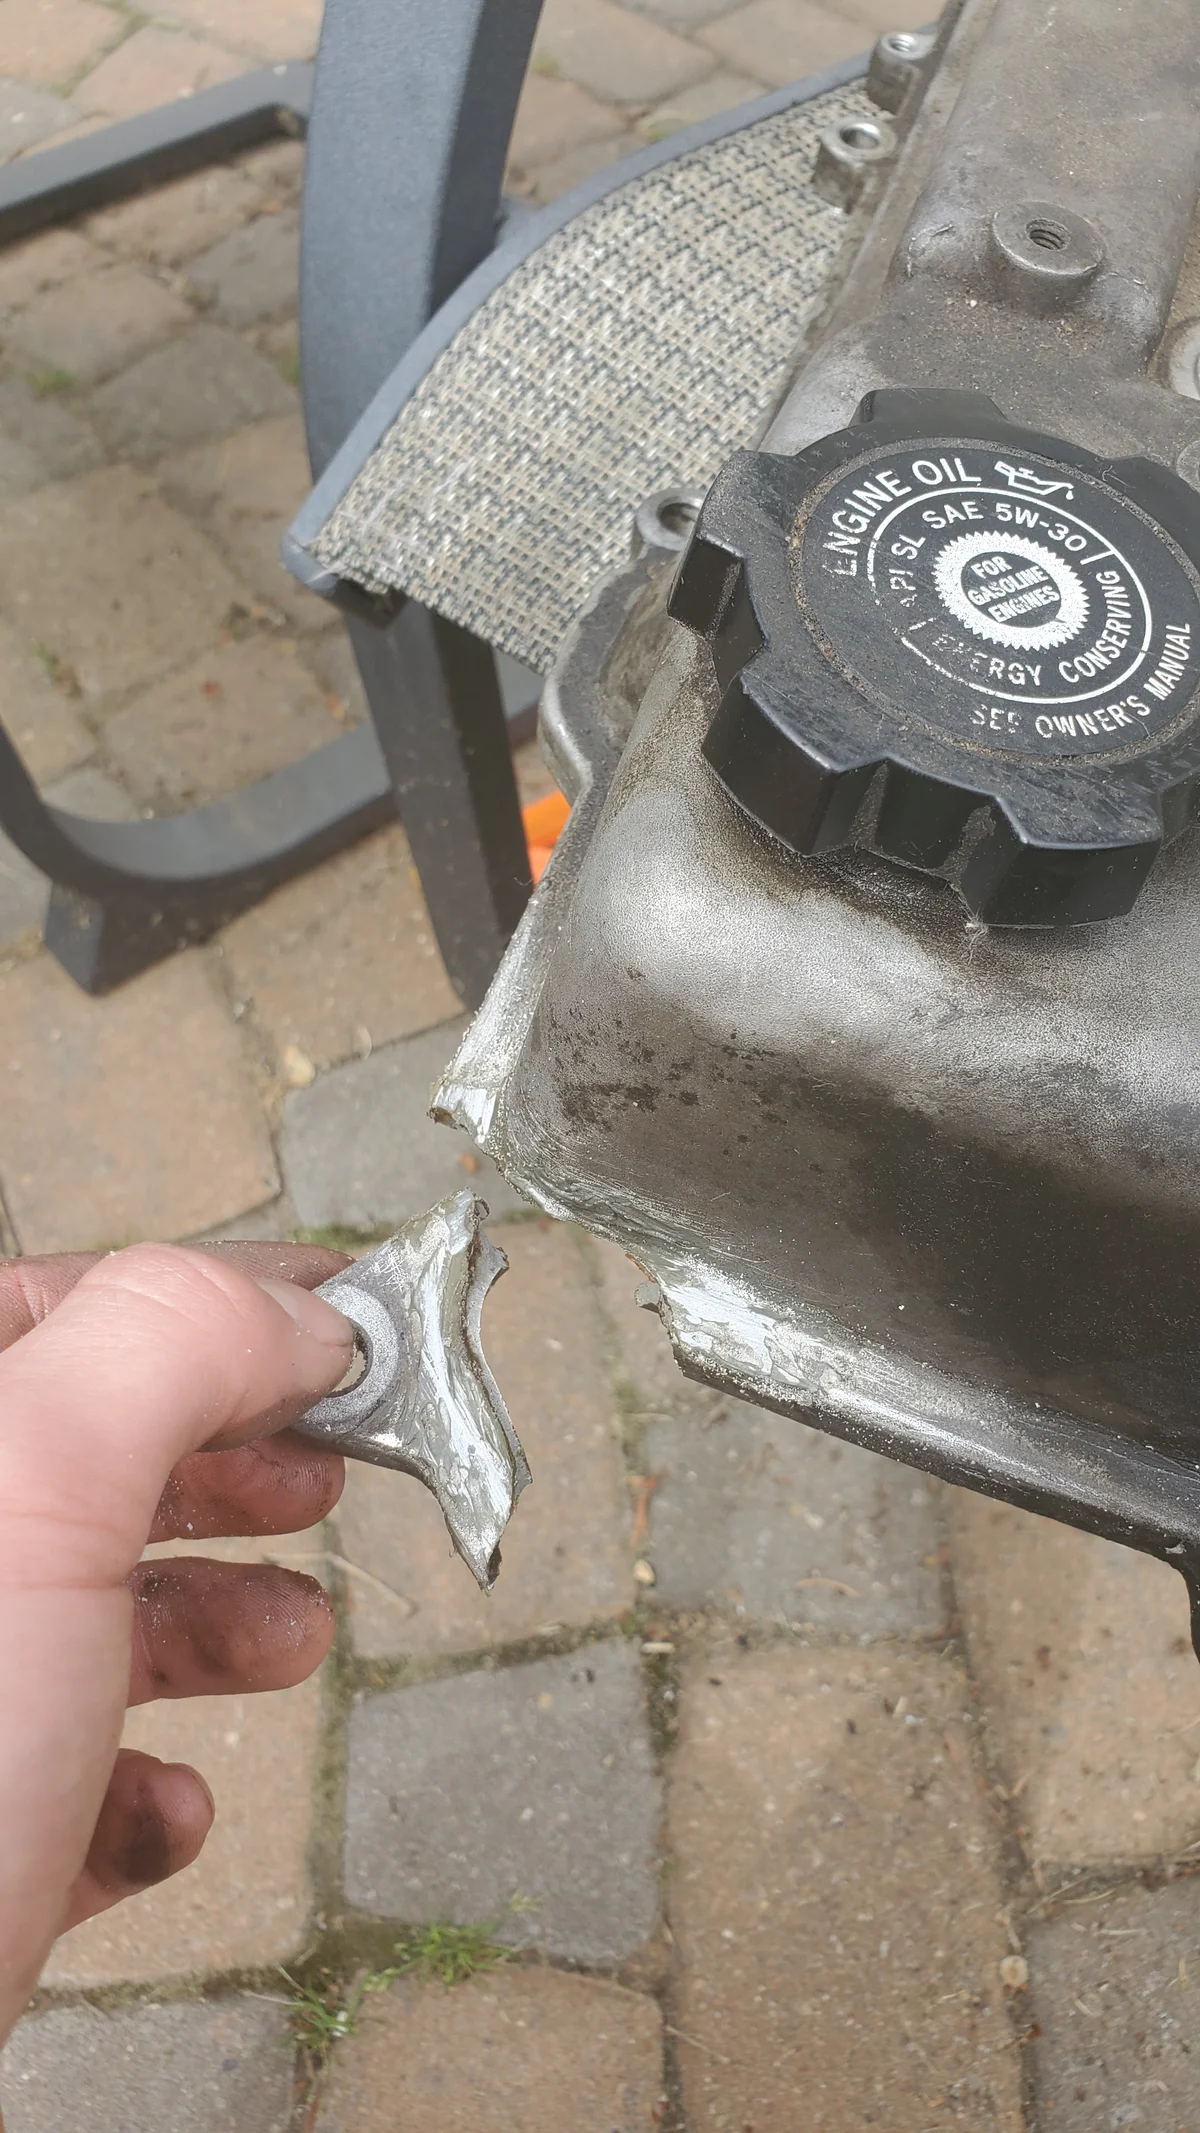
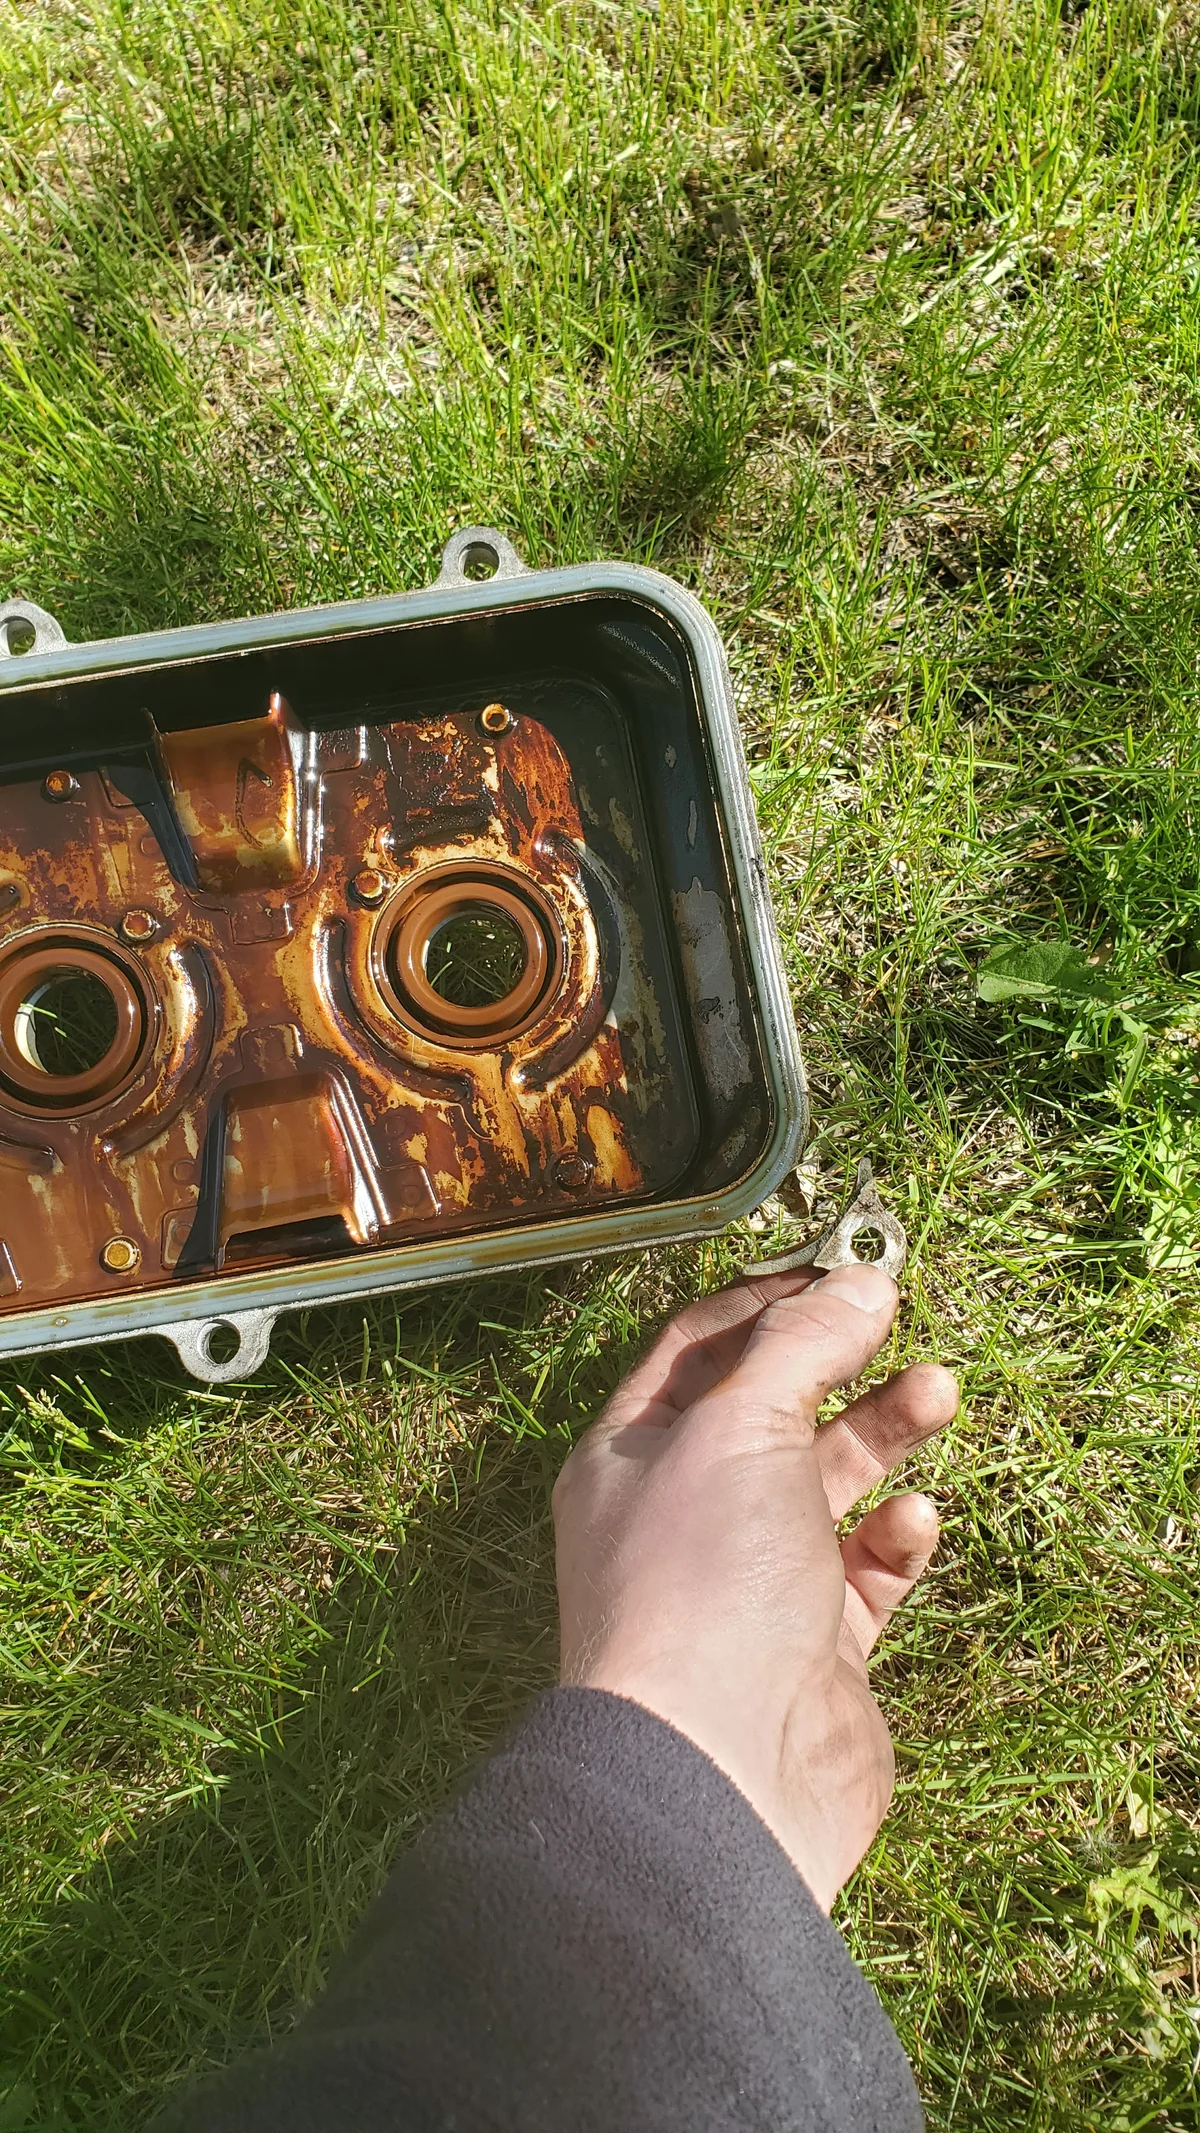
The original valve cover on my 2002 Tacoma had reached its breaking point. It ended up cracking and breaking off on one of the ends where it bolts into the block, resulting in a noticeable oil leak.
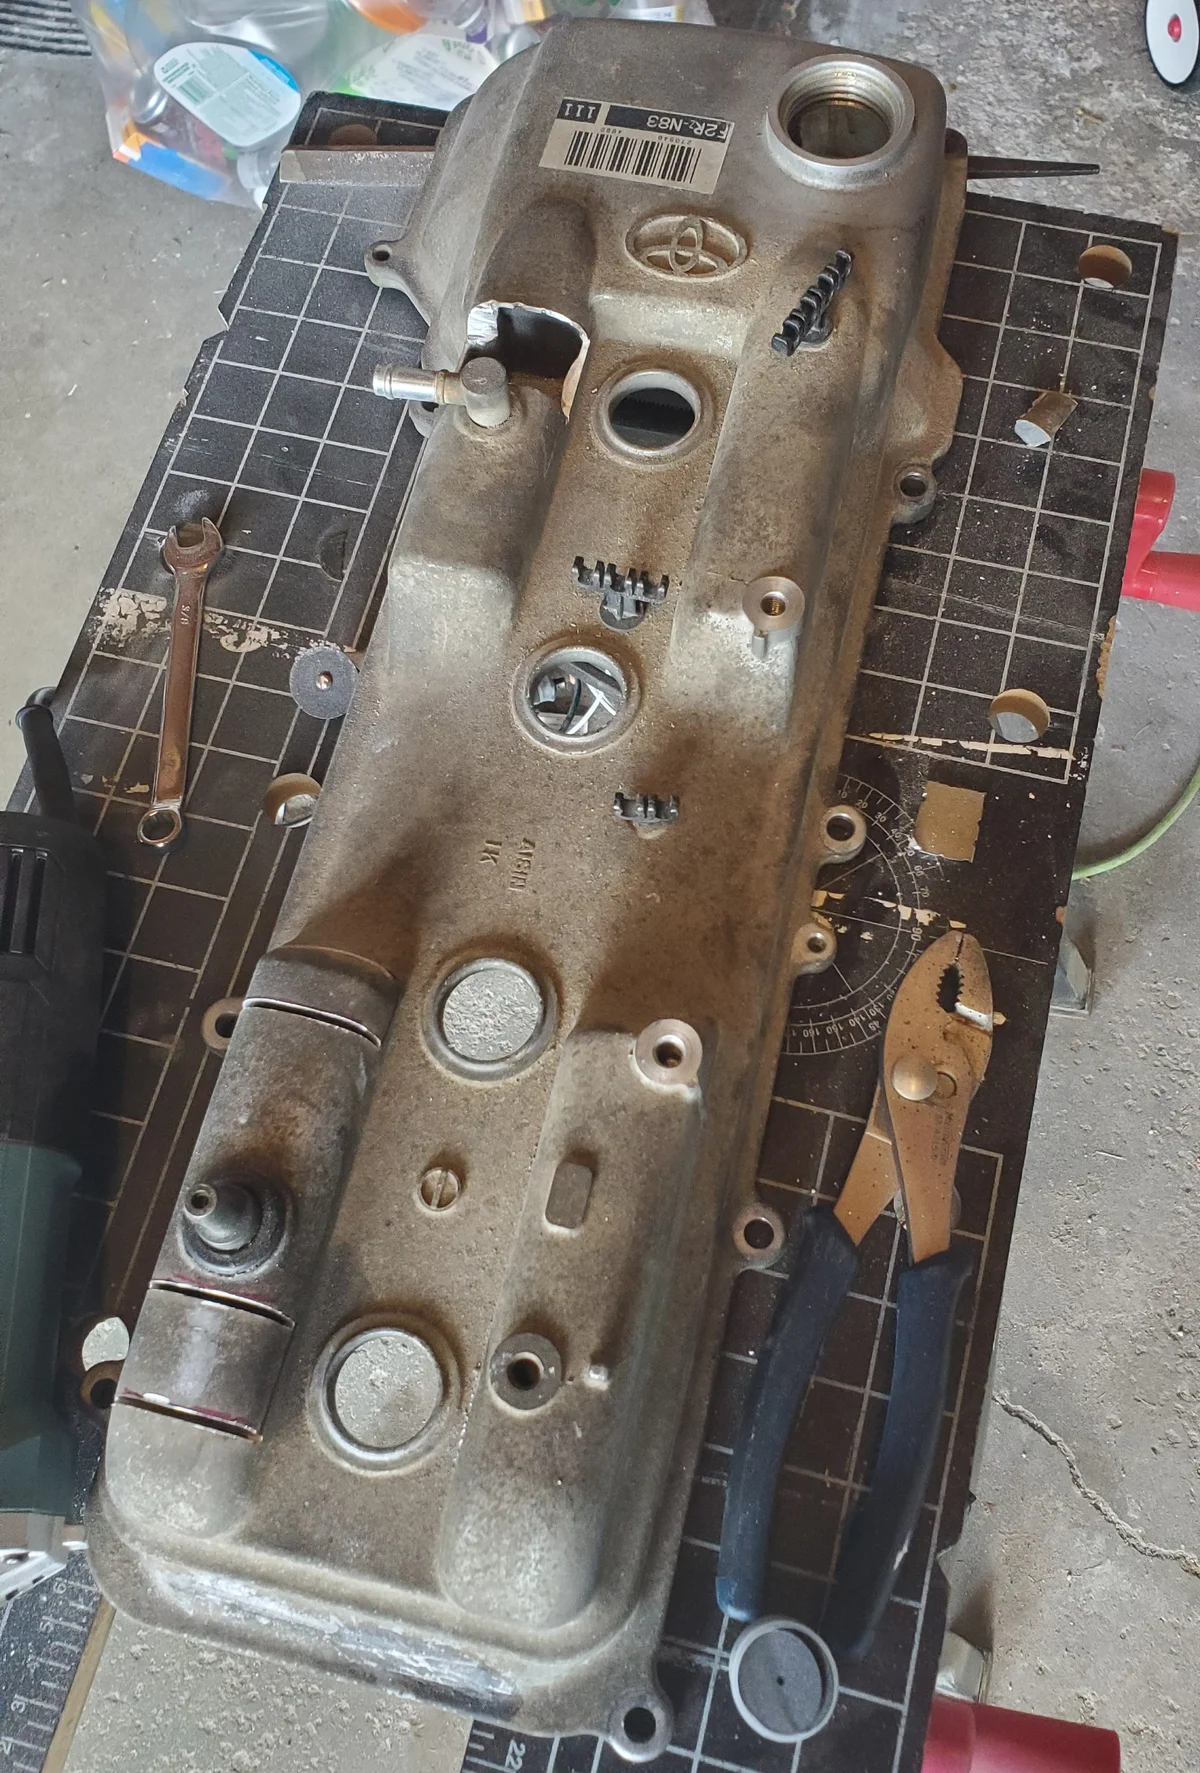
Upon inspection, it was clear that the previous owner had already struggled with this part. They had shaved down the valve cover to make the bolts fit better, which worked for a while but significantly weakened the structure. Because it was slimmer than it was designed to be, the material eventually failed under stress.
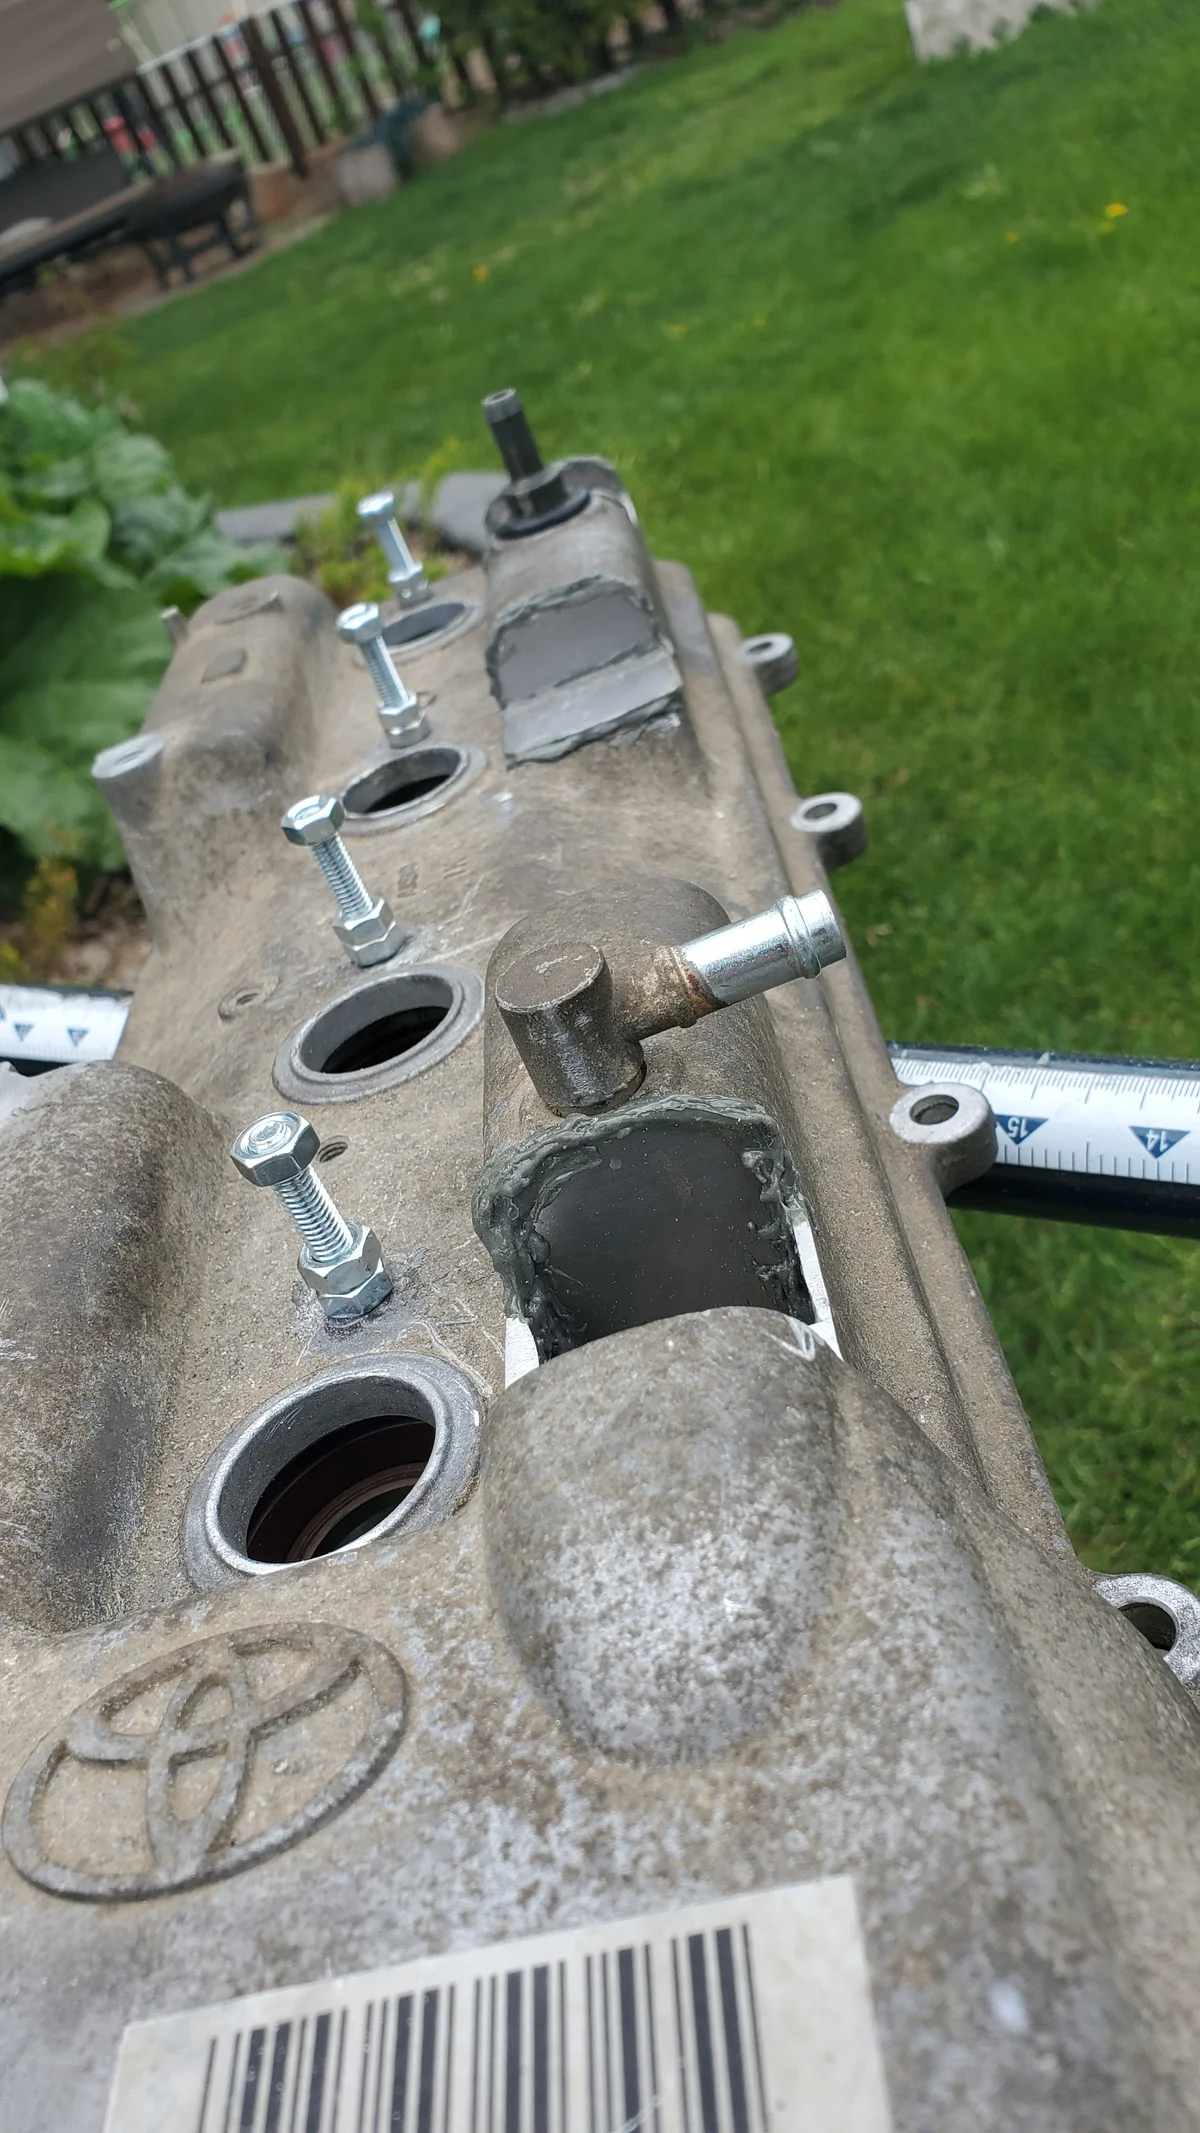
Because finding a 2002 specific replacement proved difficult, I managed to source a valve cover from a 2000 Toyota Tacoma at an auto wreck. While it bolted perfectly to the engine block, I quickly realized a major incompatibility with the spark plug wires. The 2002 model uses 90-degree boots, while the 2000 cover was designed for straight-up connectors. This meant the 2002 wires simply would not fit without significant modification to the cover itself.
So like any sane person would do, I grabbed a dremel and started cutting (rather than just buying the spark plug wires of the 2000 Toyota Tacoma and soldering them on).
Project Overview
Parts & Tools
- Donor Valve Cover (2000 Toyota Tacoma)
- High-Temp Black JB Weld
- Steel Chunks (Scrap)
- Nuts & Bolts (Scrap)
- Dremel Tool
- Cleaning Solvents & Degreaser
Quick Stats
- Date of Fix: May 2022
- Longevity: 4+ Years (No Leaks)
- Difficulty: 3/5 (Creative Problem Solving)
Step 1: Analyzing the Broken Part
The initial phase involved a detailed inspection of the failed component. The crack was clean through the aluminum, showing how the material had fatigued after being thinned out by a previous owner.
Step 2: Measuring and Cutting
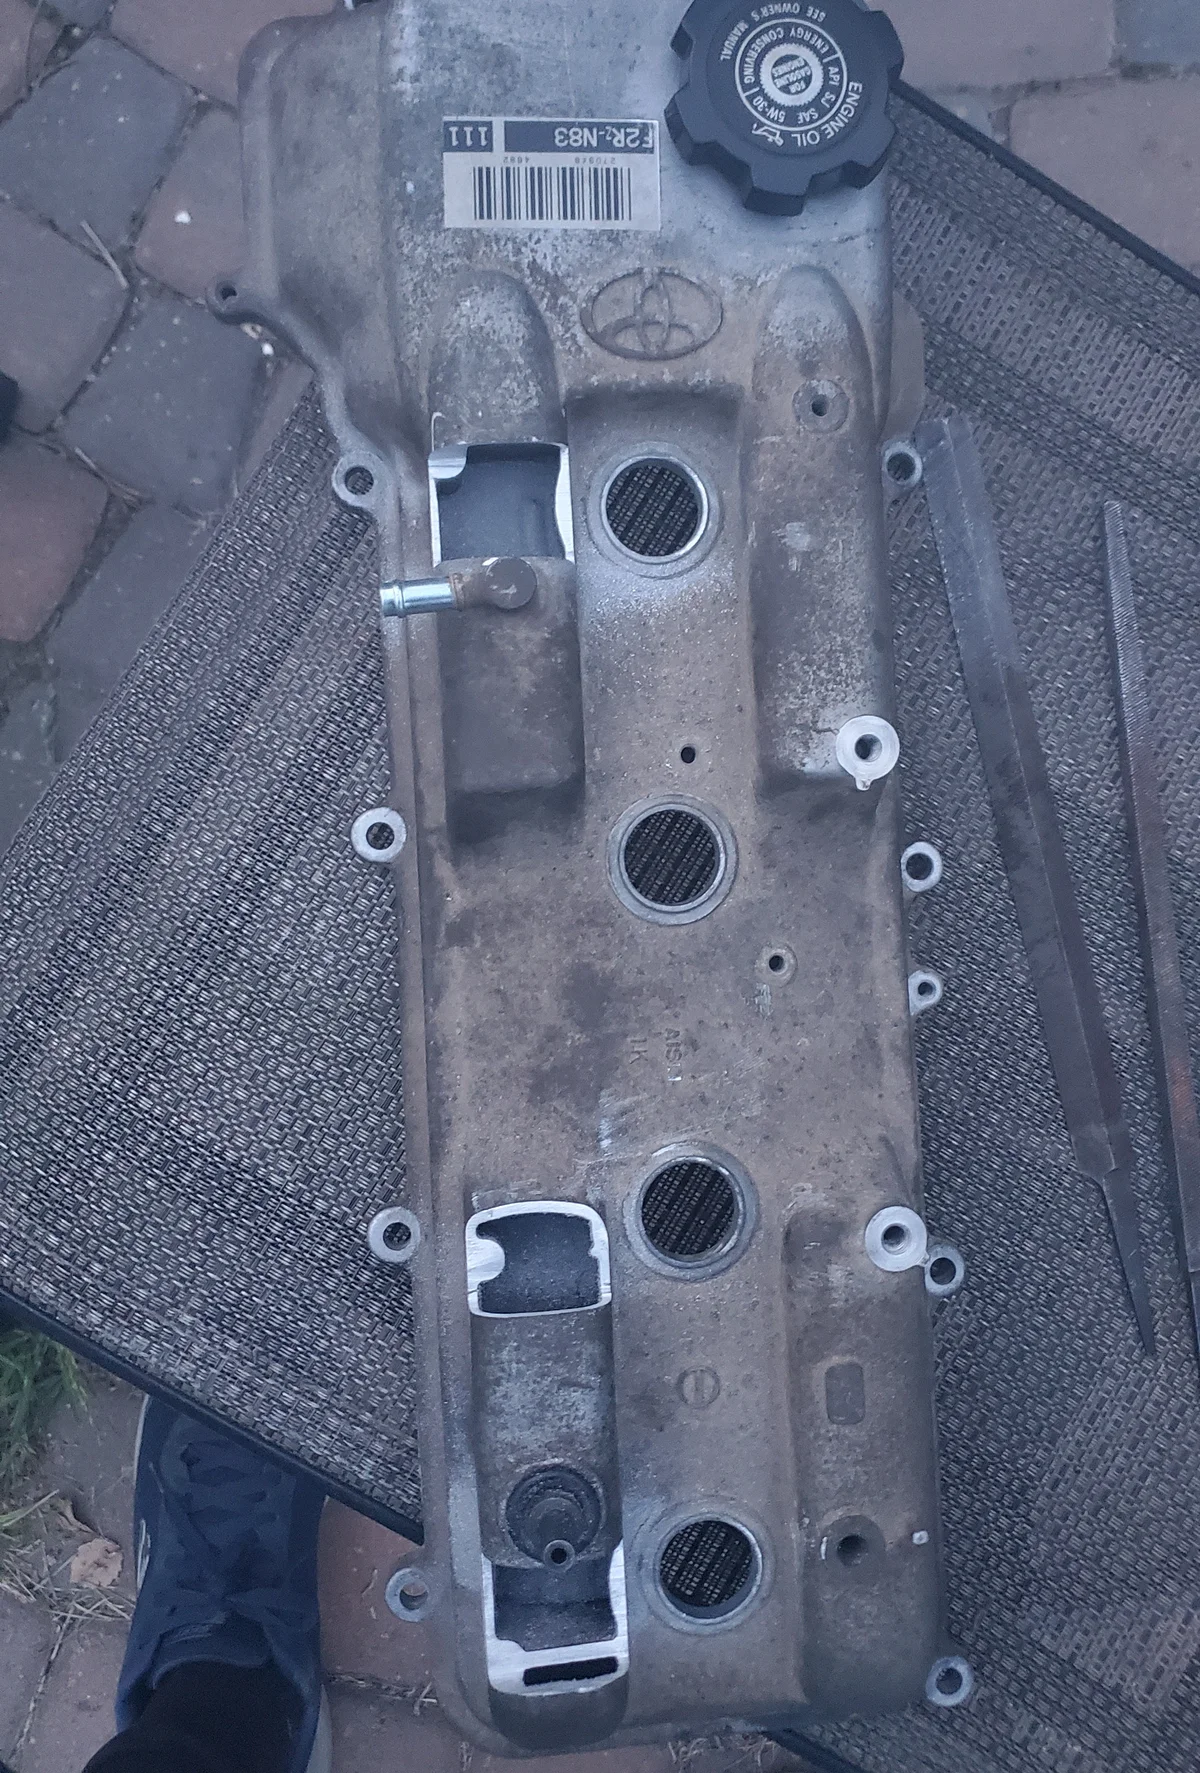
After sourcing the 2000 model donor cover, I had to map out exactly where the 90 degree spark plug boots would collide with the aluminum wall. This required semi-precise measurements before making the first structural cuts with the Dremel.
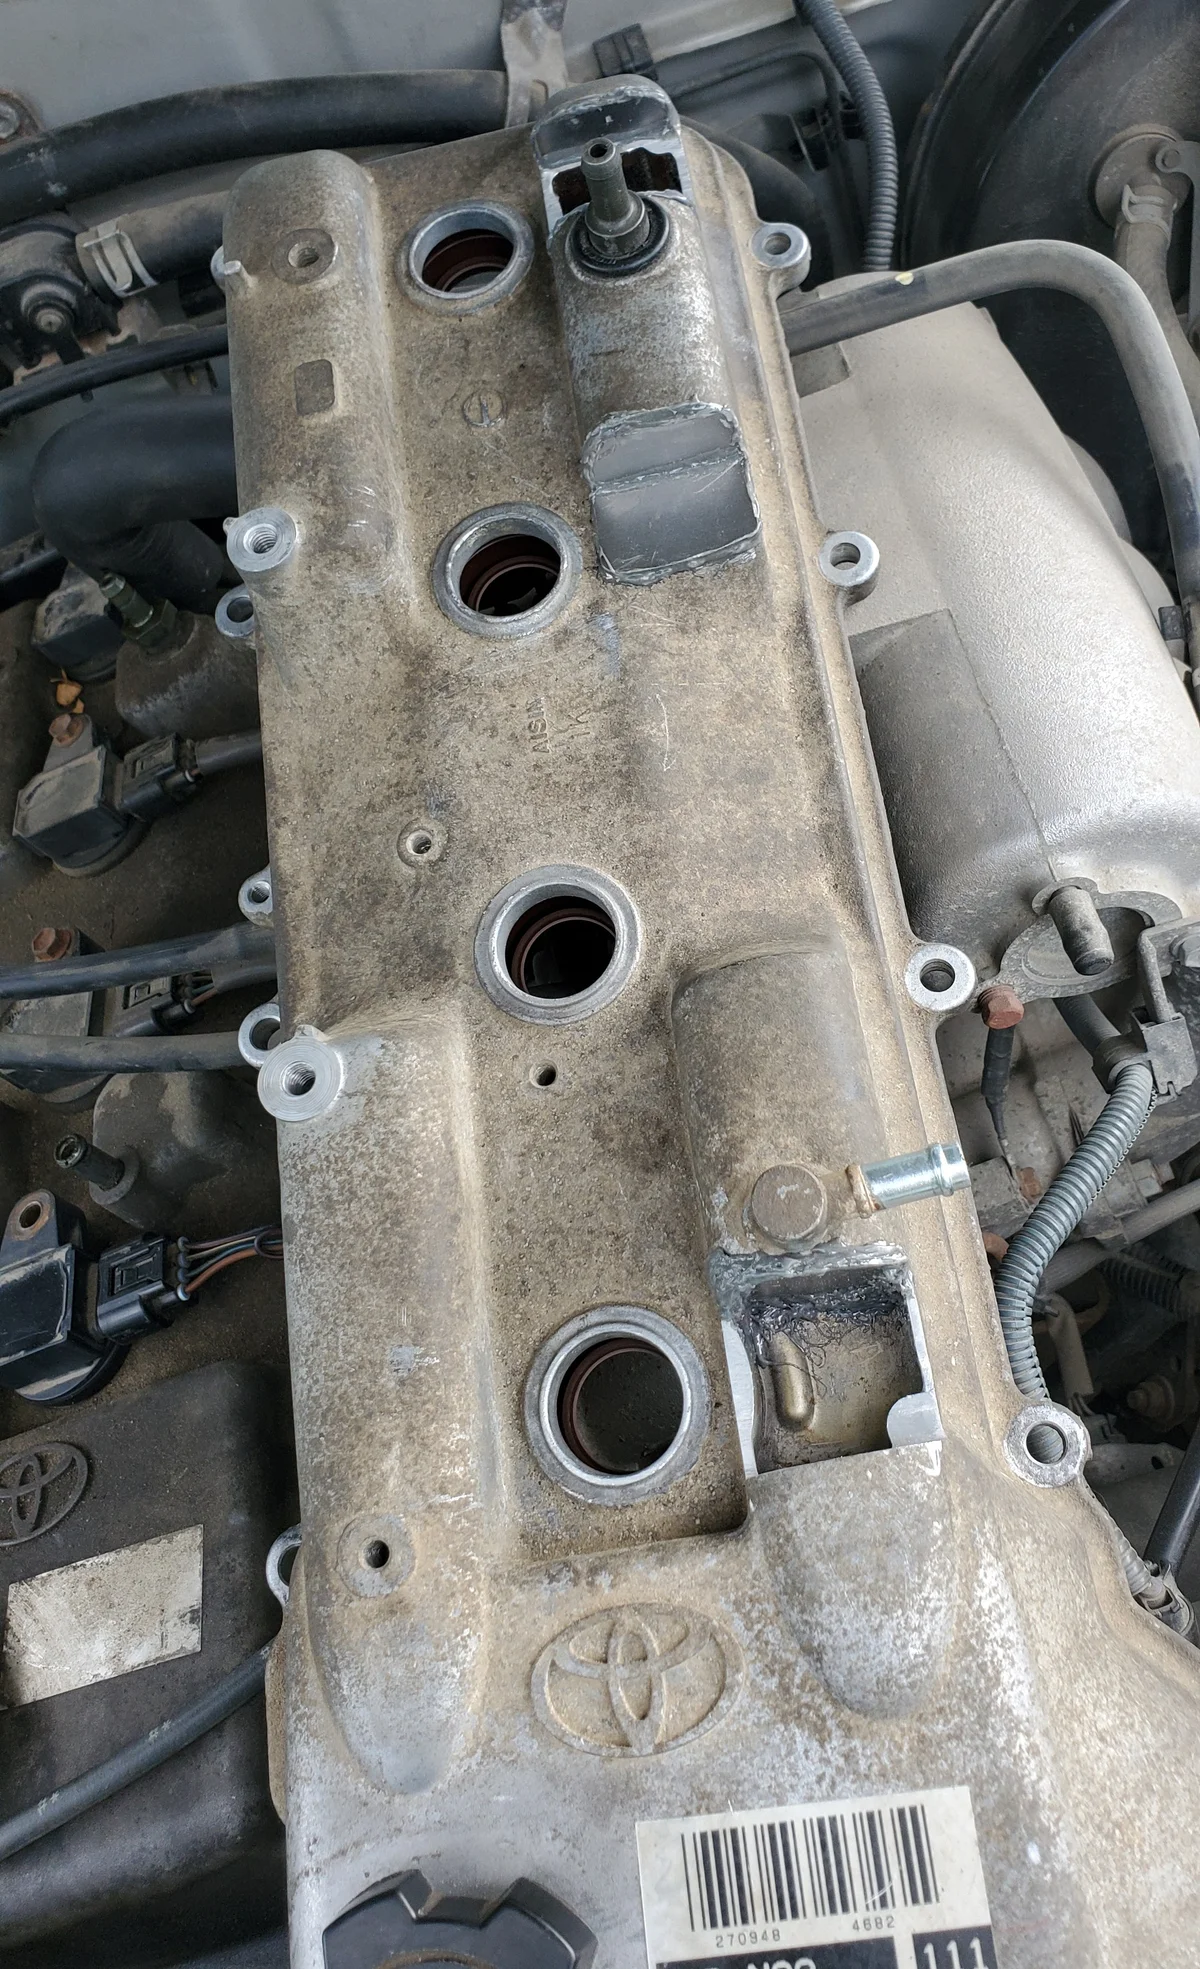
Step 3: JB Welding Custom Cut Steel Caps
With the clearance holes established, I used a scrap steel sheet from Home Depot and cut custom "caps" for the openings. These were bonded using High-Temp Black JB Weld, which was chosen for its high temperature resistance and strength in an engine environment. It basically cures like metal.
With this step however, I had to be extra careful to analyze and understand how the oil was flowing through the valve cover. If I had accidentally blocked any of the oil passages, it would have resulted in catastrophic engine failure. I made sure to check which areas I could block entirely and which I had to leave open with "custom tunnels" to ensure proper oil flow.

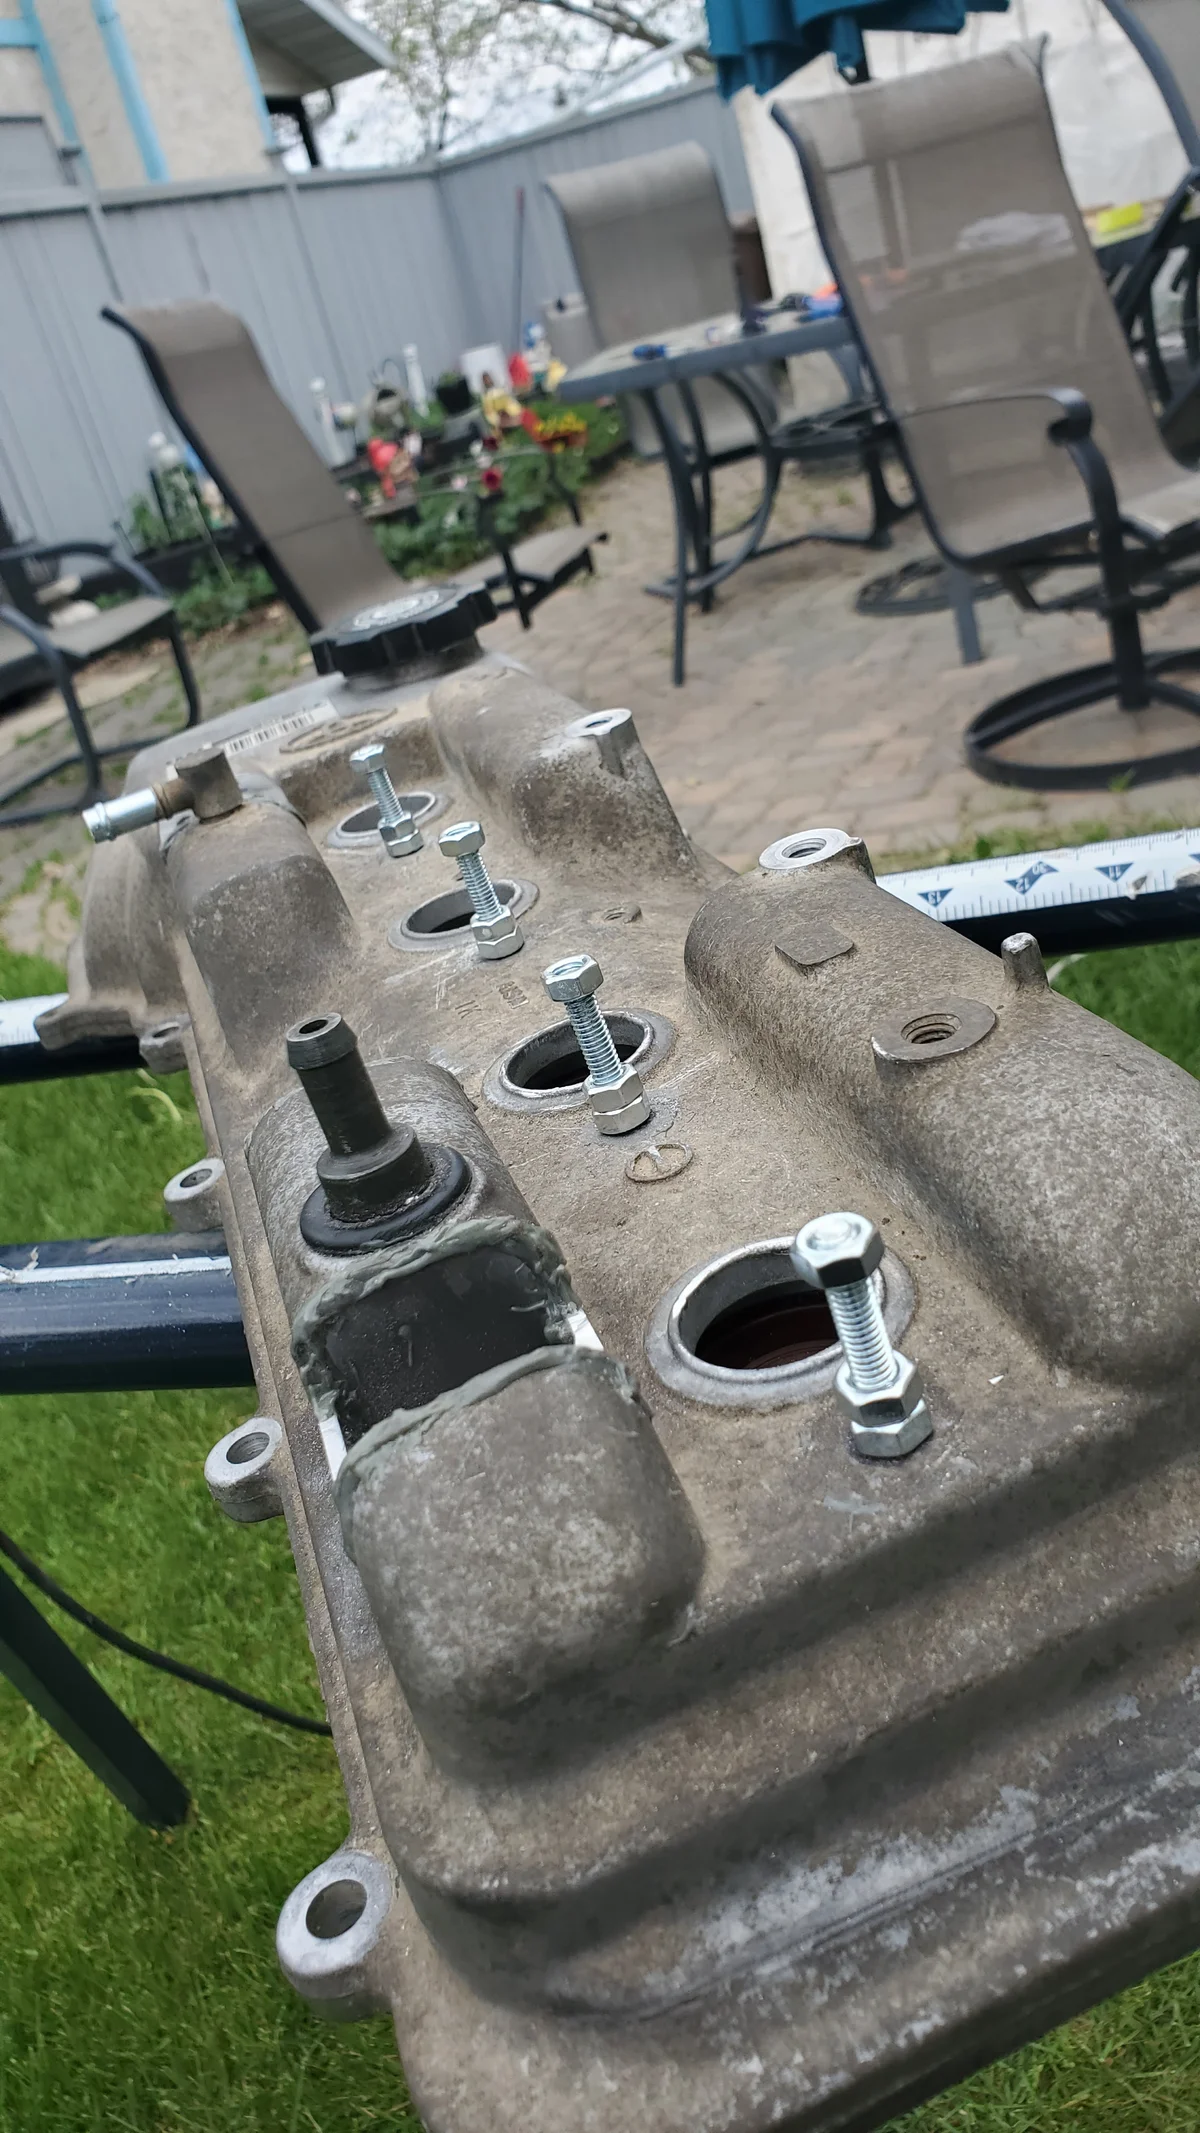
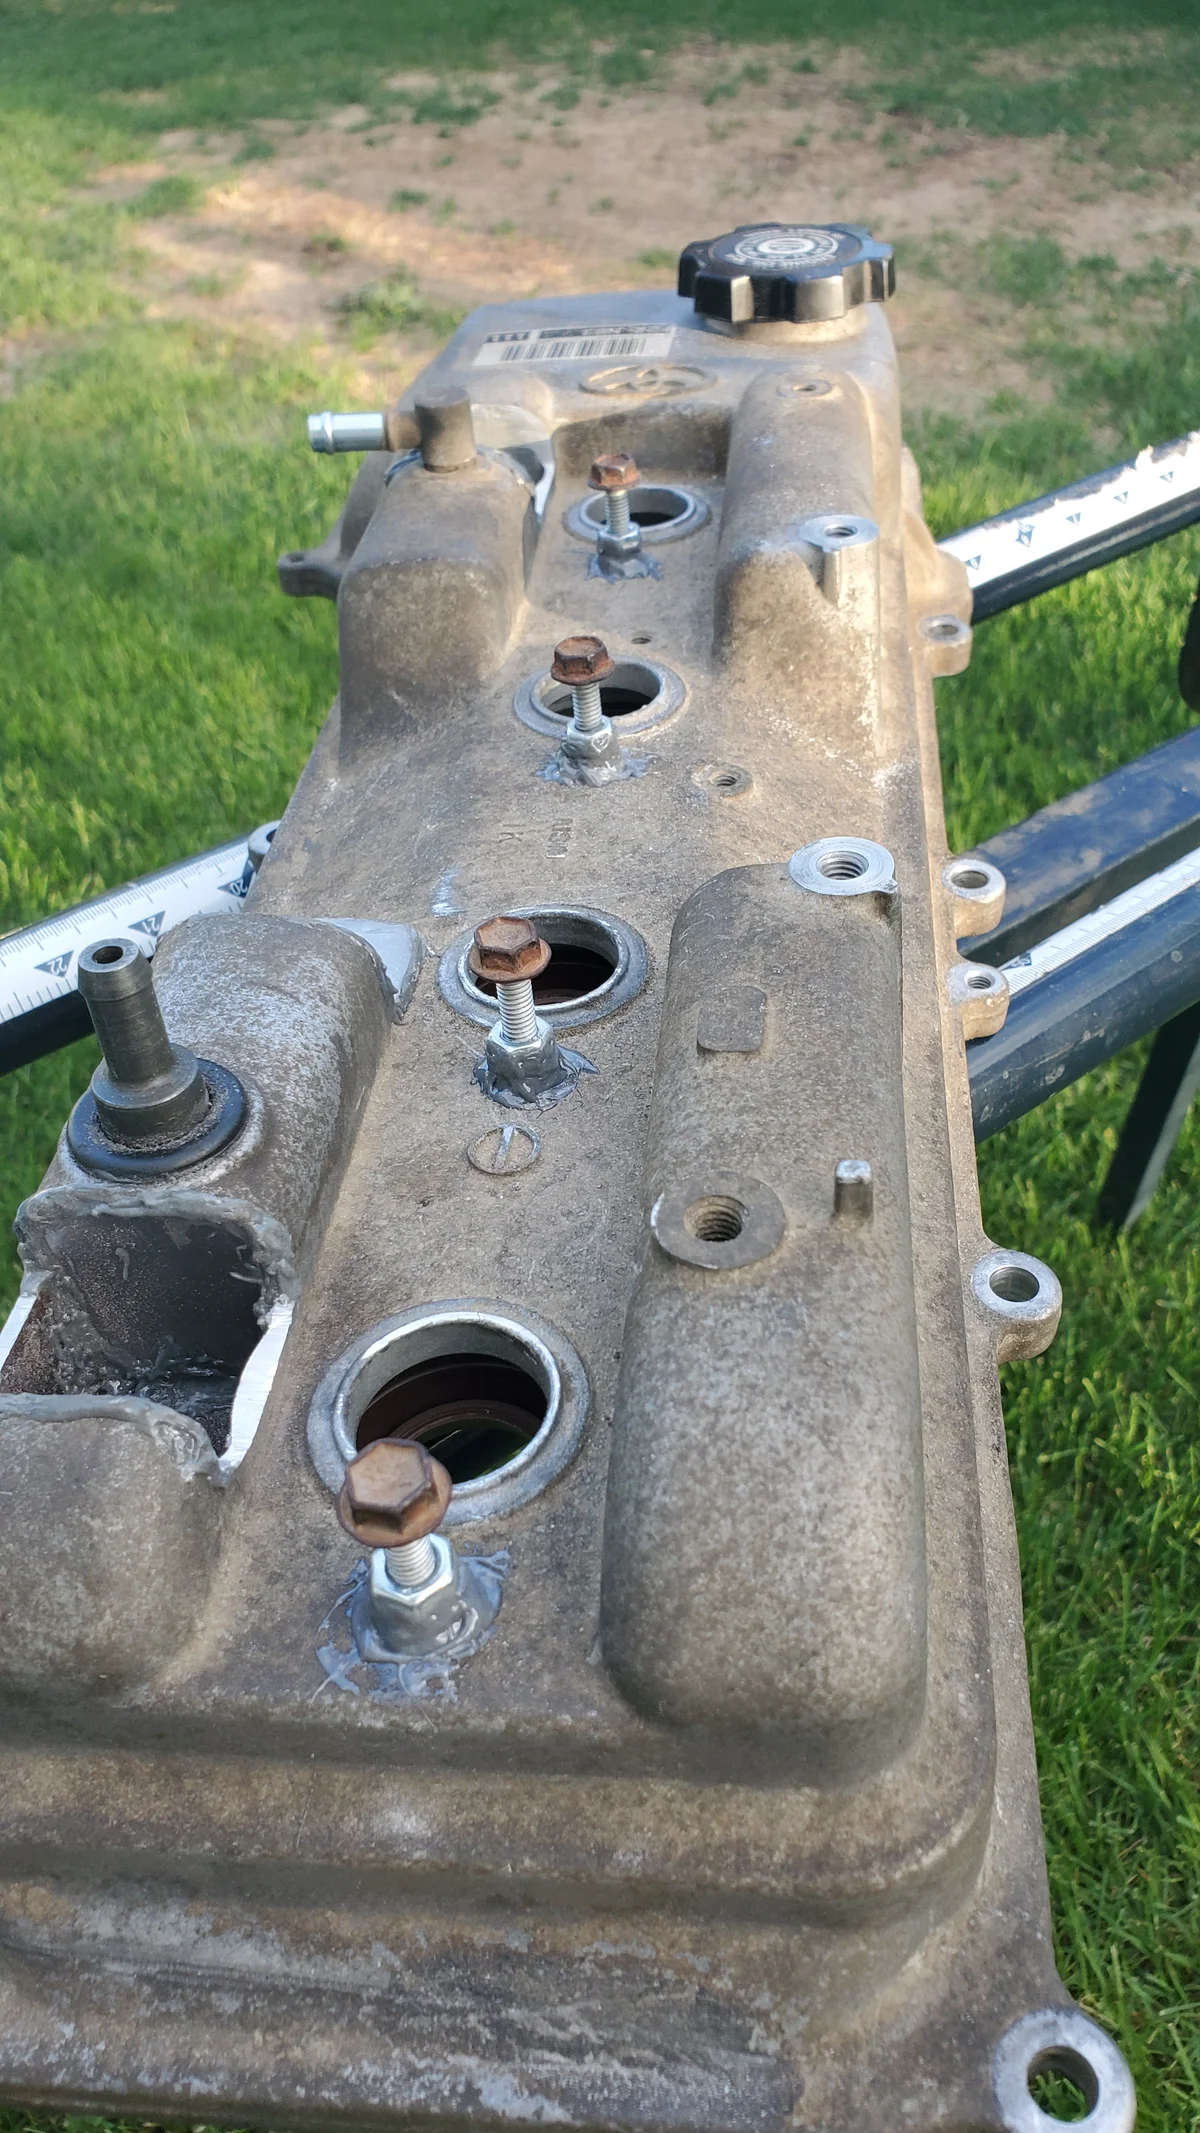
Step 4: Creating Custom Studs for Spark Plug Boots
The 2002 spark plug boots require a secure mounting point on the valve cover to hold them in place, but the 2000 donor cover lacked these specific mounts. At the time, I didn't have a tap and die set or the experience to thread the aluminum directly. To solve this, I developed a "stud and nut" workaround. I drilled holes into the cover, cut the heads off all four bolts to create threaded studs, and inserted them into the holes. I secured these studs with nuts at the base and permanently bonded them to the cover with a thick layer of JB Weld. This effectively converted the system into a stud-based mount, allowing the boots to be firmly secured with a simple nut on top.
Closing Thoughts
This fix was during my earlier days of DIY mechanics. To this day, over four years later, the modification has held up perfectly with zero oil leaks. It serves as a reminder that with a bit of ingenuity (and some high-quality epoxy), you can overcome compatibility issues that might otherwise stall a project.